How to Set Up a Jupyter Notebook Server in the Cloud in 5 Minutes
Introduction
Jupyter Notebook is an open-source and easy-to-use platform for data analysis in Python, R, Julia and 40 other languages. It allows you to create and share documents that include live code, equations, and other multimedia resources. More than that, Jupyter fosters a collaborative environment, enabling you to work with others in real time.
Jupyter Notebook allows for seamless iterative coding where you can create notebook documents called "notebooks." These are shareable, reproducible research documents with rich text elements, equations, code, and outputs (figures, tables, interactive plots). Notebooks can also be exported into raw code files, HTML or PDF documents, or used to create interactive slideshows or web pages, giving you a wide range of options for your work.
There is also a generative AI integration for Jypyter notebooks titled JupyterAI, which enhances productivity and enables interactions with large language models (LLMs) like GPT-3, Claude, and Amazon Titan. JupyterAI opens up new possibilities for data scientists and developers, allowing them to leverage the power of AI within their Jupyter notebooks.
Prerequisites
Before we start, we will need a GPU server to host the JupyterAI Notebook instance. NodeShift provides a fleet of advanced GPUs explicitly tailored for this purpose.
You can check out the GPU offerings at https://app.nodeshift.com/.
Step-by-Step Guide to Set Up a Jupyter Notebook Server on the NodeShift Cloud Platform
Step 1: Sign Up and Set Up a NodeShift Cloud Account
Visit the NodeShift Cloud portal (https://app.nodeshift.com/) and create an account. Once you've signed up, log into your account.
Follow the account setup process and provide the necessary details and information.

Step 2: Create a GPU Virtual Machine
NodeShift GPUs offer flexible and scalable on-demand resources in the form of NodeShift Virtual Machines (VMs) equipped with diverse GPUs. These GPU-powered VMs provide enhanced control over the environment, allowing configuration adjustments for GPUs, CPUs, RAM, and Storage based on specific requirements.
Navigate to the menu on the left side. Select the GPU VMs option, create a GPU VM in the Dashboard, click on the Create GPU VM button, and create your first deployment.
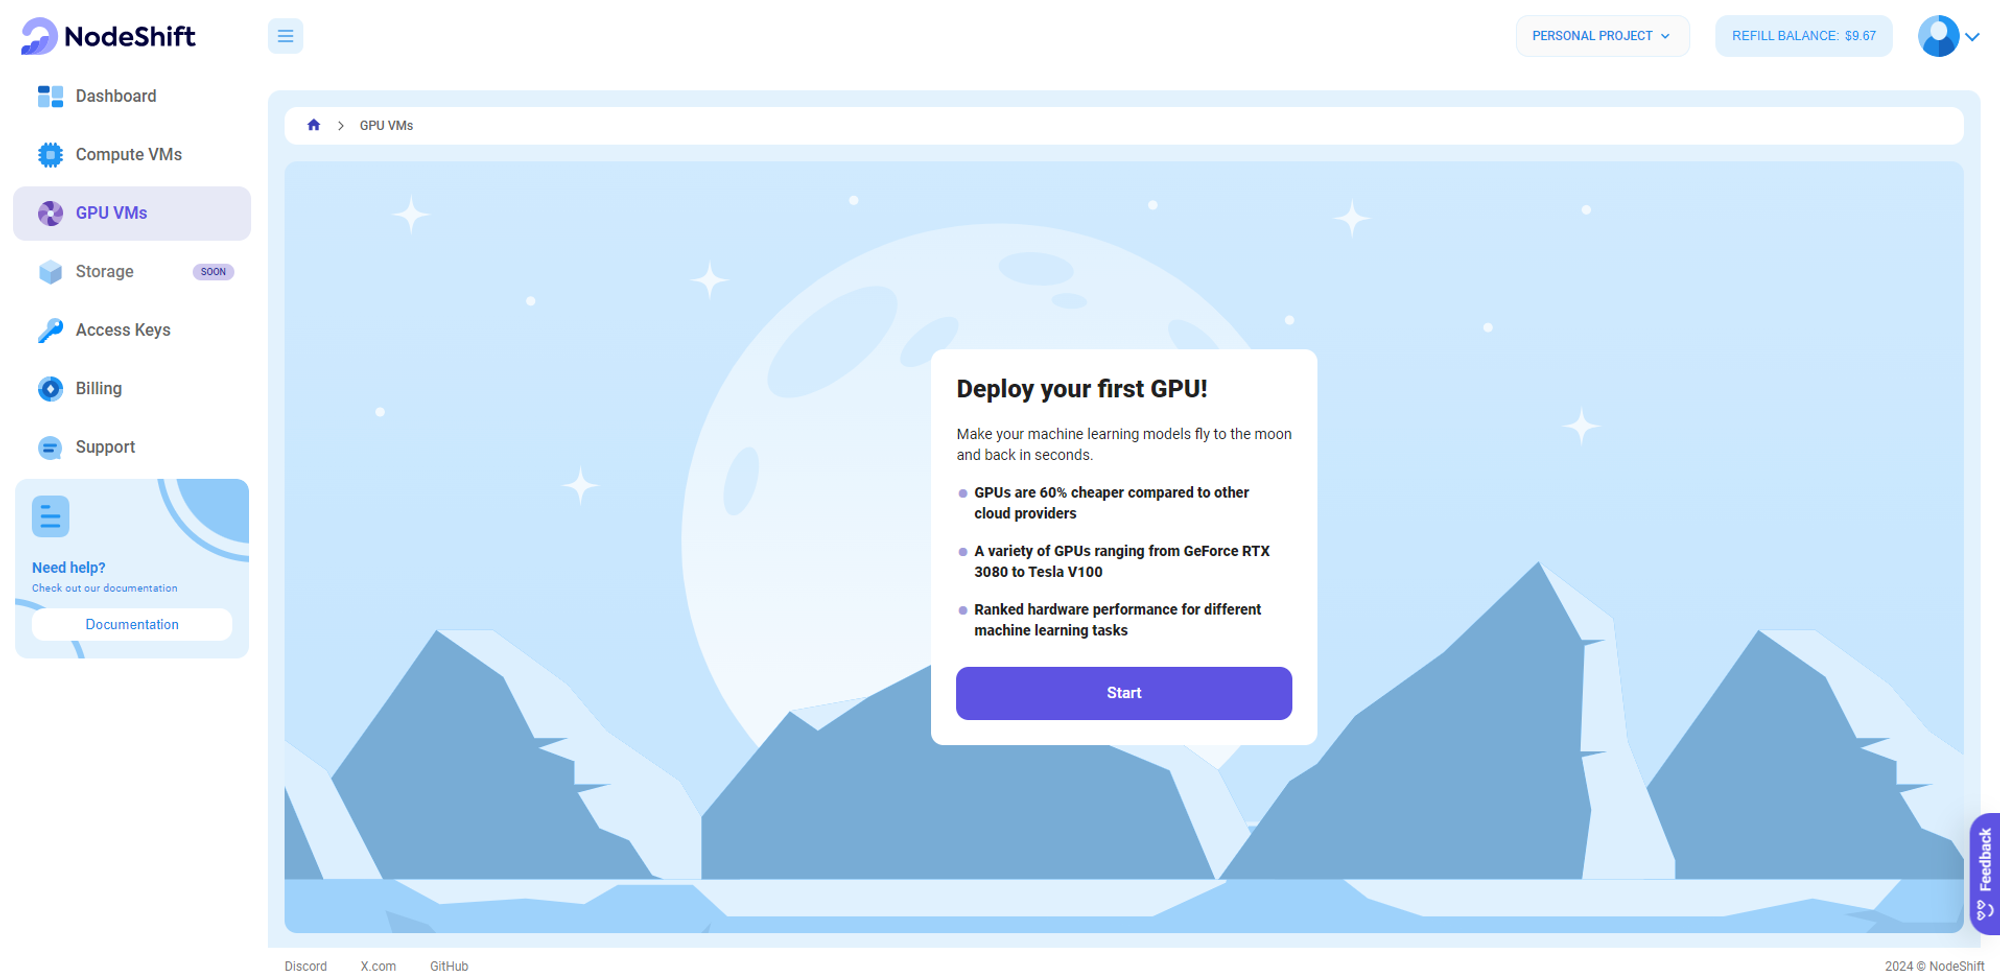
Step 3: Select a Model, Region, and Storage
In the "GPU Deployment" tab, configure your Virtual Machine by selecting the GPU Model, storage requirements and the desired location (or select the Jupyter Image first so you're given the minimum required hardware to be able to launch it).
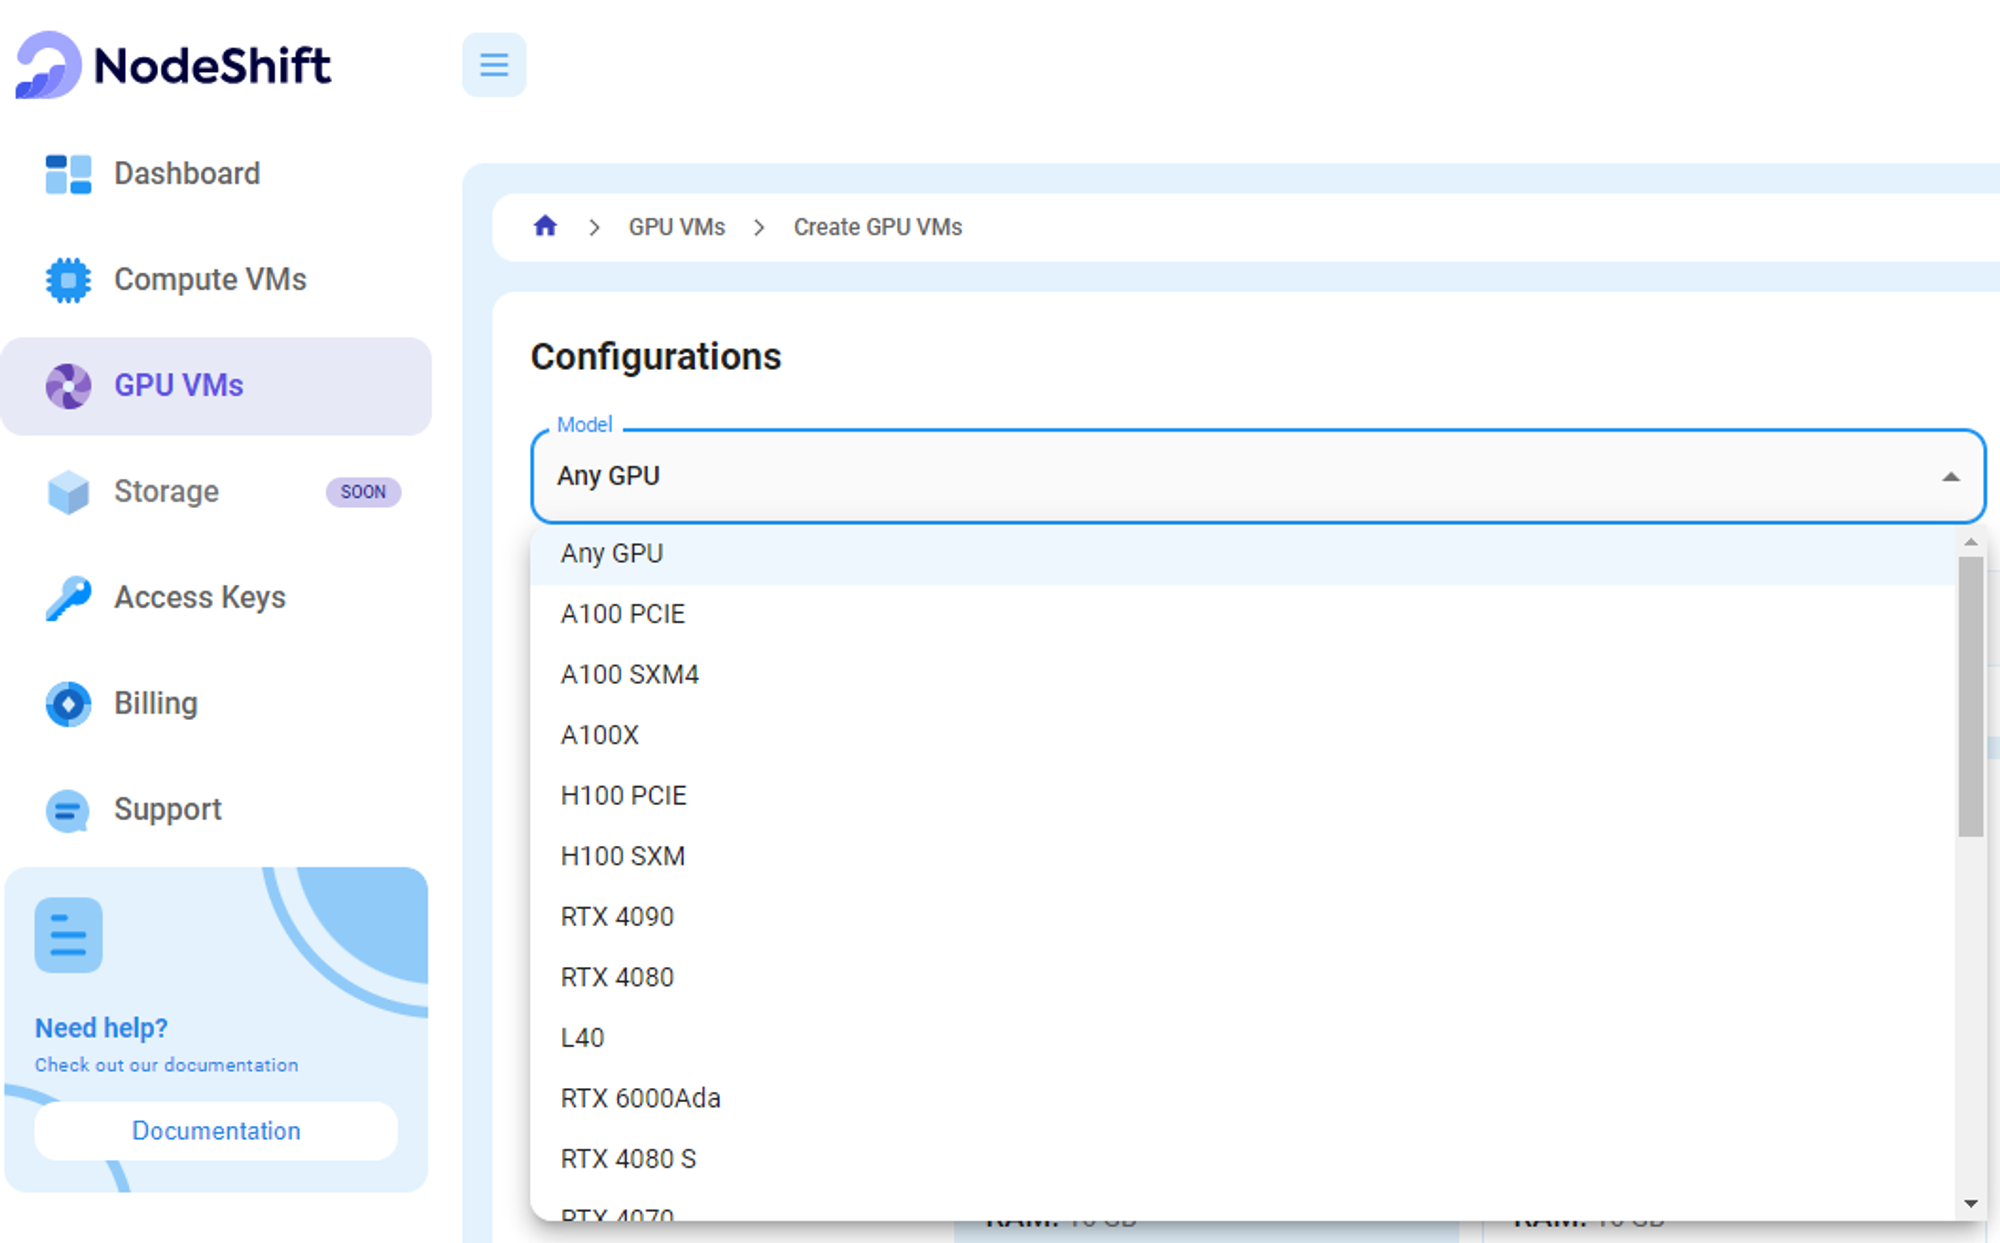

Note: We have a wide range of models available, such as the A100 PCIE, H100 SXM, RTX 4090, Tesla V100 etc.
Step 4: Select Authentication Method
There are two authentication methods: Password and SSH Key. SSH is considered a more secure option than other methods.

If you want to create new SSH Keys, head over to our official documentation (https://docs.nodeshift.com/gpus/create-gpu-deployment)

Step 5: Choose an Image
Next, you willl need to choose an image for your Virtual Machine. There are multiple templates available for you such as Tensorflow, Pytorch, NVIDIA Cuda, Deepo, Whisper ASR Webservice, and Jupyter Notebook; for this particular tutorial, we will deploy a Jupyter Notebook.
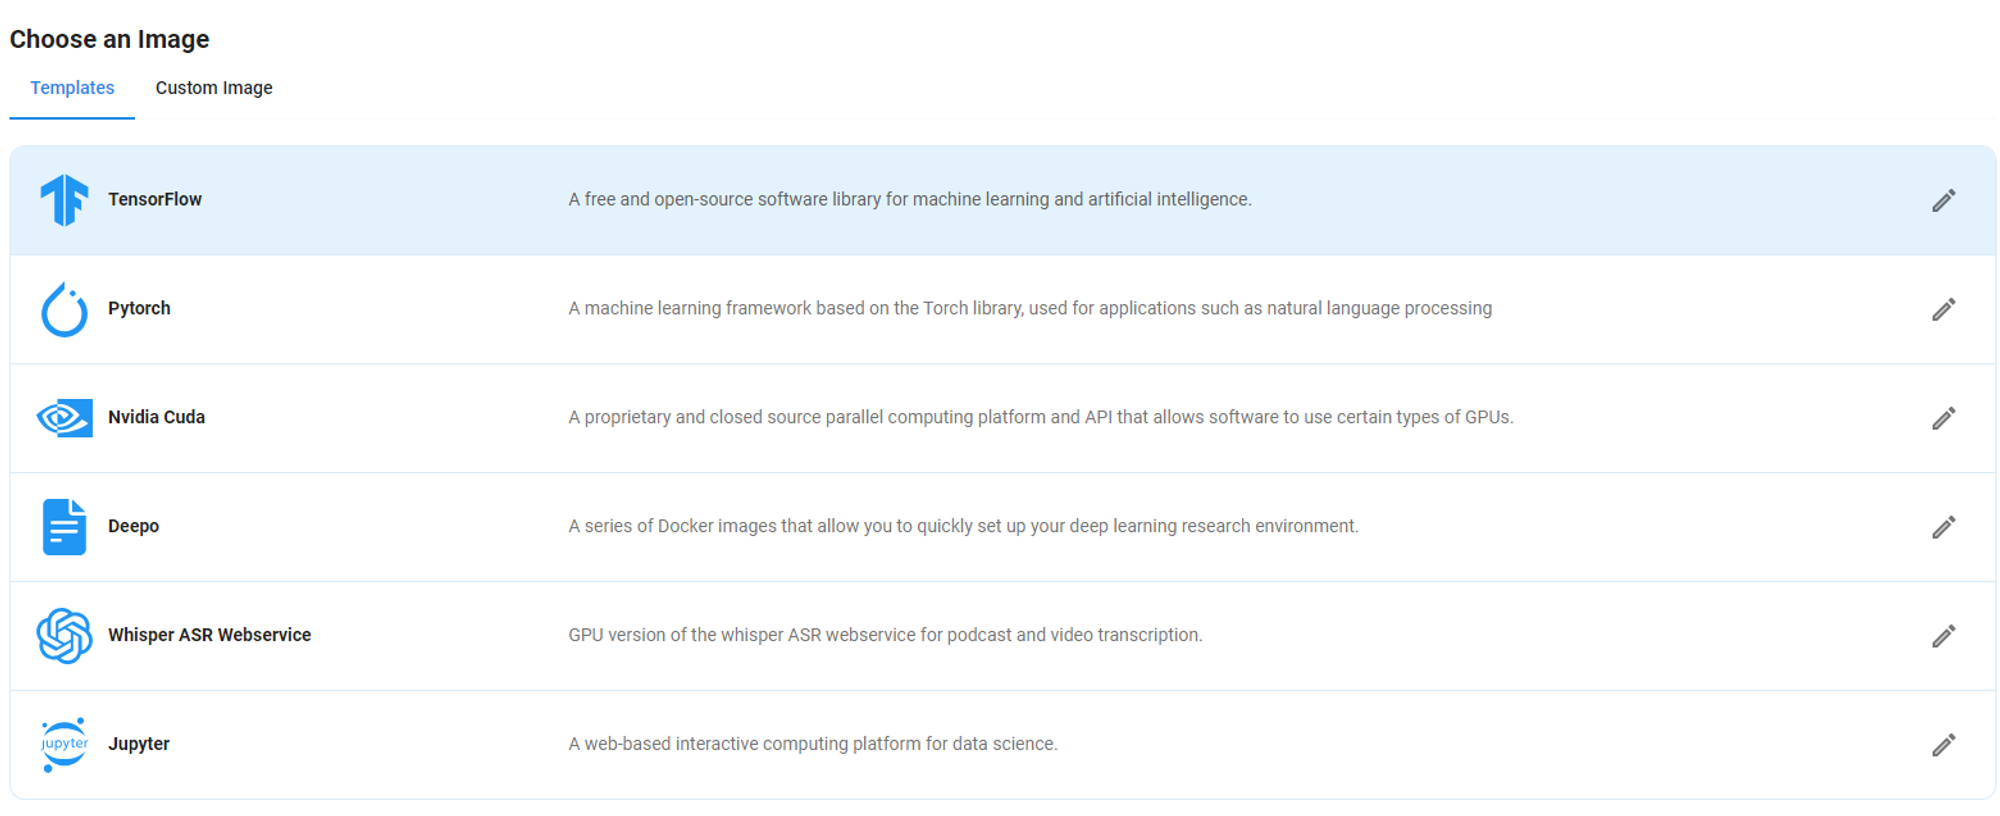
After completing the above steps, click on the 'Create' button and your Virtual Machine will be deployed.
Step 6: Complete Deployment
After the deployment is completed, you are taken to the the virtual machine page, receiving confirmation that it is successfully created.

Step 7: Connect
Once your GPU VM deployment is successfully created and has reached the 'RUNNING' status, you can navigate to the page of your GPU Deployment Instance. Then, click the 'Connect' Button in the top right corner.

After clicking the 'Connect' button, you will be able to view the Jupyter Notebook.
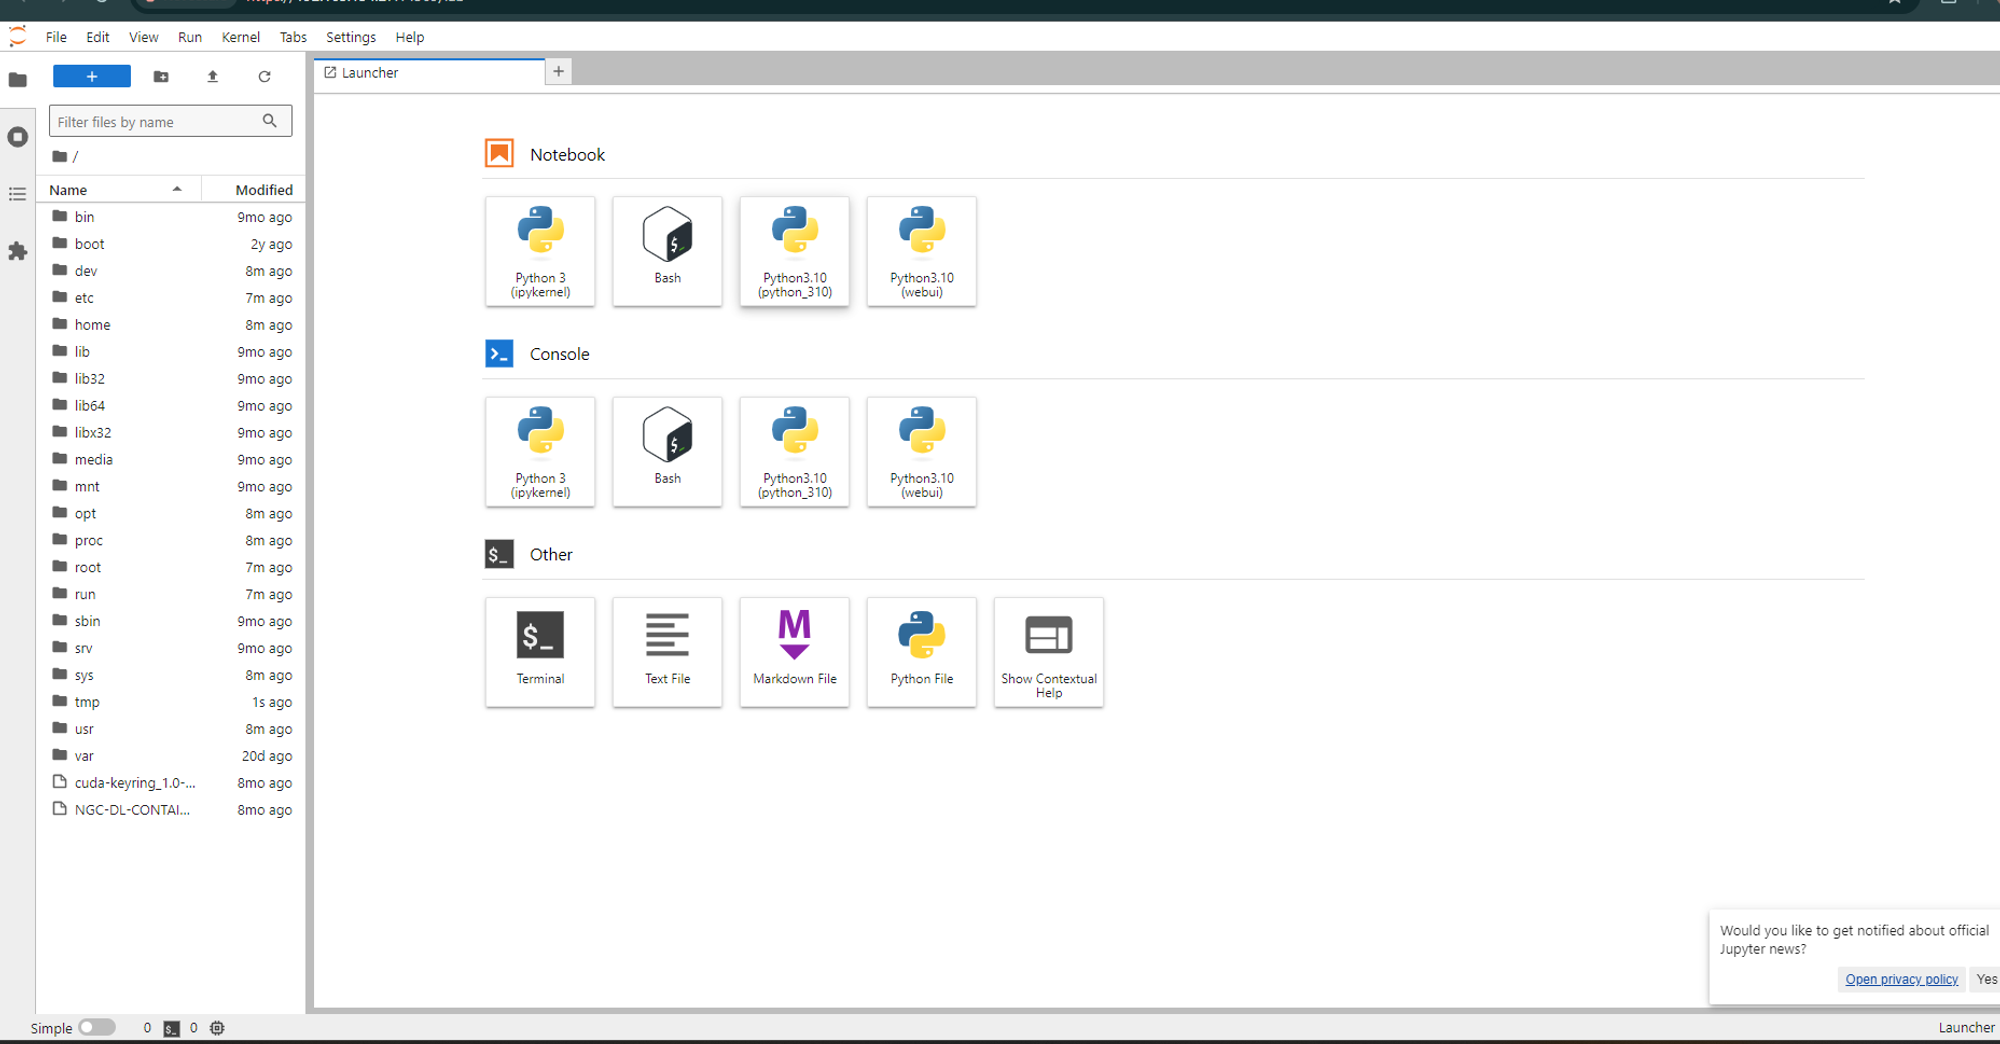
Try NodeShift
If you are looking for an easy-to-use and affordable cloud solution, give NodeShift a try. It's an affordable alternative to AWS, Microsoft Azure, Google Cloud and DigitalOcean that allows you to deploy cloud resources at scale in a seamless way.
Sign Up: app.nodeshift.com
Conclusion
Setting up a Jupyter Notebook Server in the cloud with NodeShift is straightforward and can be completed in minutes. Following these steps, you can leverage powerful GPUs for your data analysis, machine learning, and AI projects, taking full advantage of Jupyter's collaborative and interactive environment. Whether working solo or with a team, NodeShift's flexible and scalable solutions ensure you have the resources needed for seamless, efficient computing.
For more information about NodeShift:


